• Welcome to OGBoards 10.0, keep in mind that we will be making LOTS of changes to smooth out the experience here and make it as close as possible functionally to the old software, but feel free to drop suggestions or requests in the Tech Support subforum!

Official Pit Home Improvement/DIY thread

Do you have a ceiling fan that you can reverse the direction on? The heat is going to rise and warm the air over your head well before it warms you up down at ground level.

We do on the top floor, which obviously has been a bit warmer than the rest of the house, but only around 66 or 68. I haven't turned those on reverse yet. There's one fan in the eat-in kitchen. I'll try that a bit tonight too, certainly couldn't hurt.
 
Do you have a ceiling fan that you can reverse the direction on? The heat is going to rise and warm the air over your head well before it warms you up down at ground level.

i have a split level; i think it's just the physics of the heating style. forced air dumps new air into the room; faster and more easily counteracts the leaky windows we have yet to replace. it works pretty well when it's in the 30s - not so much when it's 5º and windy
 
A lot of heating systems were just not built large enough for the really cold weather in much of the country lately. Well that, combined with not enough insulation to keep the heat in and leaky windows and doors make for some cold houses. It is not really the type of heat that matters, it is the capacity of the system to deliver heat that matters. The type of heat just drives the cost.
 
A buddy of mine bought a foreclosure in Kure Beach a few months ago and we've slowly been working on making it habitable. We've pulled up the carpet/linoleum all over the house so we're just working with a concrete slab at this point. He wants to tile the 2 bathrooms (full) and the kitchen. We're thinking of tackling one of the bathrooms ourselves and then decide from there if we want to hire someone to do the other bathroom/kitchen or do it ourselves. I like to think I'm pretty handy, but I've never done a tile job. Besides the measuring, how difficult of a job is this? I know we'd need to rent a wet saw to do the cutting of the tile.
 
Tile is not too hard to do if you are patient.

Get the right tools. Wet saw, as you noted for straight line cuts . If you rent more than a few days, buying may be cheaper than renting. Also nibbler if you have to do very small cut outs,or need to approximate curves, such as around the toilet drain pipe. Need the toothed trowel for either thinset mortar or glue to attach the tile to the floor. Which you use depends on the tile, the floor material and your preference. Get the cross shaped plastic spacers in the proper size for whatever size grout lines you choose to use. Get a good grout placement and smoothing tool.

Measure the room in both directions to make sure you don't end up with a tiny sliver of tile at one side. If it looks like you will, plan on splitting to add a half tile to the sliver. If you want to really have it even, need to find the center of the room, and based on the calculation mentioned, figure out whether the center is a grout line or middle of a tile - in both directions. If the room isn't too big and has work space, you may want to lay out a "cross" of tiles with spacers to make sure you have the edges calculated correctly so you don't end up with narrow pieces at the edge. Anything less than 1/4 tile is generally small, depending on the size of the tile.

It is always easier to work from one corner to an adjacent corner, then continue from that wall, working in rows to the opposite wall. If you don't mind possibly being a little off in "balancing" the edges, this might be the way to go. Just make sure you won't end up with less than about a quarter tile.

Remember the old carpenter's rule "measure twice, cut once"

Once the tiles have been down for at least the time recommended by the glue/mortar, get the spacers out and work the grout into the grooves. Grout that includes sealer is better for bathrooms. Premixed grout is easier to use, but costs more than the powder you need to mix with water and grout additives. Don't forget to sponge the faces of your tile clean before the grout has time to set up on them.

Put silicon caulking around the edge of the room, particularly at the joint between the tile and a floor mounted tub. Tubs flex a little, just enough to crack a grout joint over time. Putting caulking in the joint between the tile and tub will prevent this, and keep water from getting under the tile.

You will have a better looking job if you remove the toilet and tile under it, then re-install the toilet (new wax ring) and after re-installing, caulk around it where it meets the new floor. Sometimes getting toilet out can be difficult. Sometimes not. If you can't get it out, tile to it and caulk between the tile and the toilet. taking out the toilet allow the toilet to hide the maybe not so smooth edges where the tiles had to be cut to fit around the waste pipe. That is also why there is a flange around the fill pipe if it comes up from the floor.


Make sure the tile you put on the floor is floor tile! It is really depressing to put tile meant for walls on the floor, and then have it crack when walked on because it isn't thick enough for foot traffic.

Good luck!
 
Anyone have experience with pathway lighting outside? There are no street lights in my neighborhood and on a cloudy night, the steps/sidewalk from my driveway to my front door is really dark.

Should I do low voltage or high? I would rather not do solar as I don't think it's bright enough.
 
Need help identifying hinges for a project.

I'm making a side table for the couch and the top overhangs the subframe(?) by one inch. I'd like to put hinges on the inside of the frame that the top sits on in order to be able to open the lid in order to store stuff on the inside of the table. I want to keep the hardware inside the box and I don't know what type of hinges I need. I essentially followed the table design outlined here: http://www.notjustahousewife.net/2010/12/how-to-build-simple-side-table.html

Thanks in advance.

ETA: Would something like work: http://selbyhardware.thomasnet.com/...p-opening-concealed-top-lid-hinge/hc2000-90-n
 
Last edited:
Anyone have experience with pathway lighting outside? There are no street lights in my neighborhood and on a cloudy night, the steps/sidewalk from my driveway to my front door is really dark.

Should I do low voltage or high? I would rather not do solar as I don't think it's bright enough.

First issue is to get a feel for how much brightness you need/want. Go to a lighting store and/or big box home improvement store and see some pathway lighting up close and personal, all lighted up. How long a distance are you needing to light? Can you do it all from one side of the walkway, or do you need lighting on two sides? This project should be a blend of practical (getting enough light in the right places) and esthetic (the lighting should look good both at night and in the day time.) Depending on the area/length of walkway, you may want to consider a combination of low and regular voltage lighting. A rough sketch with approximate dimensions of the area you want to light would be helpful.

There are three basic ways to control on/off: manual switch, timer switch and photocell (electric eye). Your choice, depending on the particulars of your situation.

Low voltage lighting installation is a lot easier than regular voltage. Many low voltage kits come with a photocell controller. Roll out the wire, connect the lamps where you want them, stick them in the ground, plug in the transformer, done. (Assumes you already have an outdoor outlet you can connect to easily. If not, that will need to be installed.)

Regular (120 volt) lighting will require a lot more work in terms of doing proper water tight connections for each lamp you install. Depending on the size of the area, one or two lamps on posts (~6 ft tall) might work. Some of these can be quite attractive in the yard.

As with all outdoor wiring, a GFI either in the breaker box or at an outlet closest to the breaker box is a good idea. Only needed one per circuit!!!
 
Need help identifying hinges for a project.

I'm making a side table for the couch and the top overhangs the subframe(?) by one inch. I'd like to put hinges on the inside of the frame that the top sits on in order to be able to open the lid in order to store stuff on the inside of the table. I want to keep the hardware inside the box and I don't know what type of hinges I need. I essentially followed the table design outlined here: http://www.notjustahousewife.net/2010/12/how-to-build-simple-side-table.html

Thanks in advance.

ETA: Would something like work: http://selbyhardware.thomasnet.com/...p-opening-concealed-top-lid-hinge/hc2000-90-n

LCD: neat idea to make that change to the table, adding a bottom to the frame and using the space for storage. However, you have a difficult hinge situation. the pivot point for the hing has to be at the outside of the frame. As designed, this distance is 1-1/2 inches from the inside of the frame (accounting for the thickness of the 1x4 frame and the 1x1 used to attach the top. You obviously wouldn't need the 1x1 for attachment, so need to only deal with 3/4 inch offset. The hinge you showed would only allow opening until the underside of the top hit the outside top edge of the frame, probably around 45 degrees or so. Need a hinge that has an actual or virtual pivot point where you need it. A simple hinge that is horizontal with the pivot point on the outside edge wouldn't be totally concealed, but would work
 
LCD: follow-up. Have you thought about doing a drawer instead? That way you won't have to clear the table (say move a lamp) to get at the stuff. I personally don't like flip top tables because there is always something on them when I want to get inside.

The drawer wouldn't even have to look like its a drawer, or even is there, unless someone looked underneath. Here's how I would do it:

Leave one of the short sides unattached. Use a piece of 1x3 or 1x4 with the wider dimension horizontal across that side, making cutouts to fit around the legs. Attach this to the top of the legs from the inside.

Put 2 drawer slides (use the ones that go on the sides of the drawer, not the bottom middle. from leg to leg. Either commercial ball bearing ones, or you can make them yourself from some 1x1. If you use wood, wax well both the slides and the drawer bottom where they make contact.

Make your drawer sides and back from 1x3. Drawer width will be determined by the space you have between the drawer slides. Use the short side piece of 1x4 as the front of the drawer. Attach to the two sides so they are just low enough to clear the horizontal piece of 1x3. This would give about ¼ inch at the bottom to grab with your fingers to open the drawer. Make either a tight (nailed and glued) or loose (cut grooves in the sides for the bottom) type bottom and put your drawer together.

You can put a drawer pull on the front, or just use the small lip underneath to pull it out to open.
 
DeaconBlue; Thanks for all the input. I thought about a drawer and stupidly went forward with the plans thinking I'd figure it out later. What I have now is the table top cut and the 1x4's and legs put together. I would have to do a little disassembly on the table at this point (or just start from scratch). I may just proceed without making it a fliptop at this point. None the less, I greatly appreciate your advice.

ETA: if someone could throw Blue some posrep, I'd appreciate it. I must spread first....
 
We do on the top floor, which obviously has been a bit warmer than the rest of the house, but only around 66 or 68. I haven't turned those on reverse yet. There's one fan in the eat-in kitchen. I'll try that a bit tonight too, certainly couldn't hurt.

Follow up after the HVAC guy visited.

According to him, the pipes for the baseboard heaters weren't sized correctly for the house and are too small. I could probably do the calculations myself and figure out what should be right, but I'm not going to. I haven't done heat transfer in far too long to try now. But that would be a ridiculous thing to try to fix, so we'll use the space heaters we got, he turned the boiler temp up just a little, and we'll deal when it gets super cold. In the 40s here today, it was very comfortable, even a little warm in the house.
 
LeftCoast: If you're going for function, I would consider using butt hinges and mortising deeply enough into the top to accommodate the full thickness of both hinge leaves. When closed, the hardware would be entirely concealed in the top. Because the lower hinge leaf would be surface mounted, without the edges of a mortise to restrain it, I'd use over-long screws into the apron. I would also cut the hinge-mortise in the top slightly wide on the barrel-side to accommodate a swing greater than 90.
 
Not to put a downer on things, but baseboard heaters just causes a fire in Kentucky that killed a mom and her 8 children while her husband and 11 year old daughter survived. Be careful with what you keep surrounding the heaters.

How often do baseboard heaters cause fires?
 
LeftCoast: If you're going for function, I would consider using butt hinges and mortising deeply enough into the top to accommodate the full thickness of both hinge leaves. When closed, the hardware would be entirely concealed in the top. Because the lower hinge leaf would be surface mounted, without the edges of a mortise to restrain it, I'd use over-long screws into the apron. I would also cut the hinge-mortise in the top slightly wide on the barrel-side to accommodate a swing greater than 90.

First post to help me? Thanks CalDeac.

If you want to go with the hinged top, I would use a long "piano hinge" which runs almost the length of the apron. More attachment points (screws into the apron), less strain on each one.

Also, I would add cabinet lid supports on each side. They would do two things: 1. limit how far the lid could tryopen, to minimize the strain on the screws holding the hinge in the apron, as CalDeac mentioned; and 2. hold the lid open when it is open so it won't slam down on your fingers.

Because of the overhang on the top, the top really cannot open more than 90 degrees. When the overhang on the top hits the outside of the apron, that is as far as it will open. This leaves the top in a precariously balanced situation. Without lid supports - either mechanical, or user - the tabletop/lid will tend to rapidly crash back to horizontal.

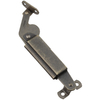
Here is one style of lid support:

033923890410sm.jpg


and a link to one of the big box stores that sells that one:

http://www.lowes.com/ProductDisplay?partNumber=311978-1277-890418&langId=-1&storeId=10151&productId=3355536&catalogId=10051&cmRelshp=req&rel=nofollow&cId=PDIO1
 
DeaconBlue; Thanks for all the input. I thought about a drawer and stupidly went forward with the plans thinking I'd figure it out later. What I have now is the table top cut and the 1x4's and legs put together. I would have to do a little disassembly on the table at this point (or just start from scratch). I may just proceed without making it a fliptop at this point. None the less, I greatly appreciate your advice.

ETA: if someone could throw Blue some posrep, I'd appreciate it. I must spread first....

Thanks for the props.

If you still want to go with a drawer and are this far, you could just (carefully) cut one of the apron pieces flush with the inside of the leg on each side, and use the piece you cut as the drawer front. If you follow the directions I gave above to make the drawer, everything will be the same except the drawer sides will be almost flush with the left and right sides of the drawer front, instead of having the leg thickness plus on each side. The piece of 1x3 going across where you cut the apron piece will keep your drawer from going through when you push it in.

Most commercial drawer slides are constructed to keep you from pulling the drawer all the way out unless you do something to release it. If you make your own slides, you may want a drawer catch so you don't pull the drawer all the way out and have it land on your toes.
 
I've got a lighting question.

We've got a large open room that currently has some light fixtures from the 1960s. We want to go brighter, but want to do something nicer than a standard T8 style light. Anyone have any experience with lights comparable in brightness to a T8 but look better? This is what we've currently got:
IMG_20140120_172311_652.jpg


IMG_20140108_173451_283.jpg
 
Back
Top